
World
Stranded Deep Worlds are randomly, procedurally, generated based on a inputted seed value. Currently only one world is permitted per profile.
Small Islands
Island.
Small Islands are characterised by a variety of small foliage such as Ficus trees and Bushes.
The starting Island is always a Small Island, prompting exploration to larger, more rewarding Islands.
Large Islands
Island.
Large Islands are usually characterised with cliff rock faces, and a variety of Pine Tree foliage.
Reefs
Reefs.
Reefs are generated surrounding shallow Island waters and are decorated with a variety of corals such as; Table Coral, Staghorn Coral, Brain Coral, Fan coral, Tube Coral, and Kelp.
Reefs are home to the majority of ocean creatures.
Oceans
Oceans.
Oceans make up the majority of Stranded Deep's environment.
Wreckages
Structures.
Shipwrecks, Seaforts, Shipping containers, etc.
Weather
Storm.
Daylight, Rain, Storms, Fog.
Cartographer
The World of Stranded Deep is created and managed through the Cartographer.
The Cartographer is found by navigating through Stranded Deep's Main Menu > Cartographer.
To generate a new world, overriding the existing one, click on Create New World at the bottom left of the screen.
This will prompt the Seed input screen.
Randomly generated worlds can be replicated by re-using the seed value.
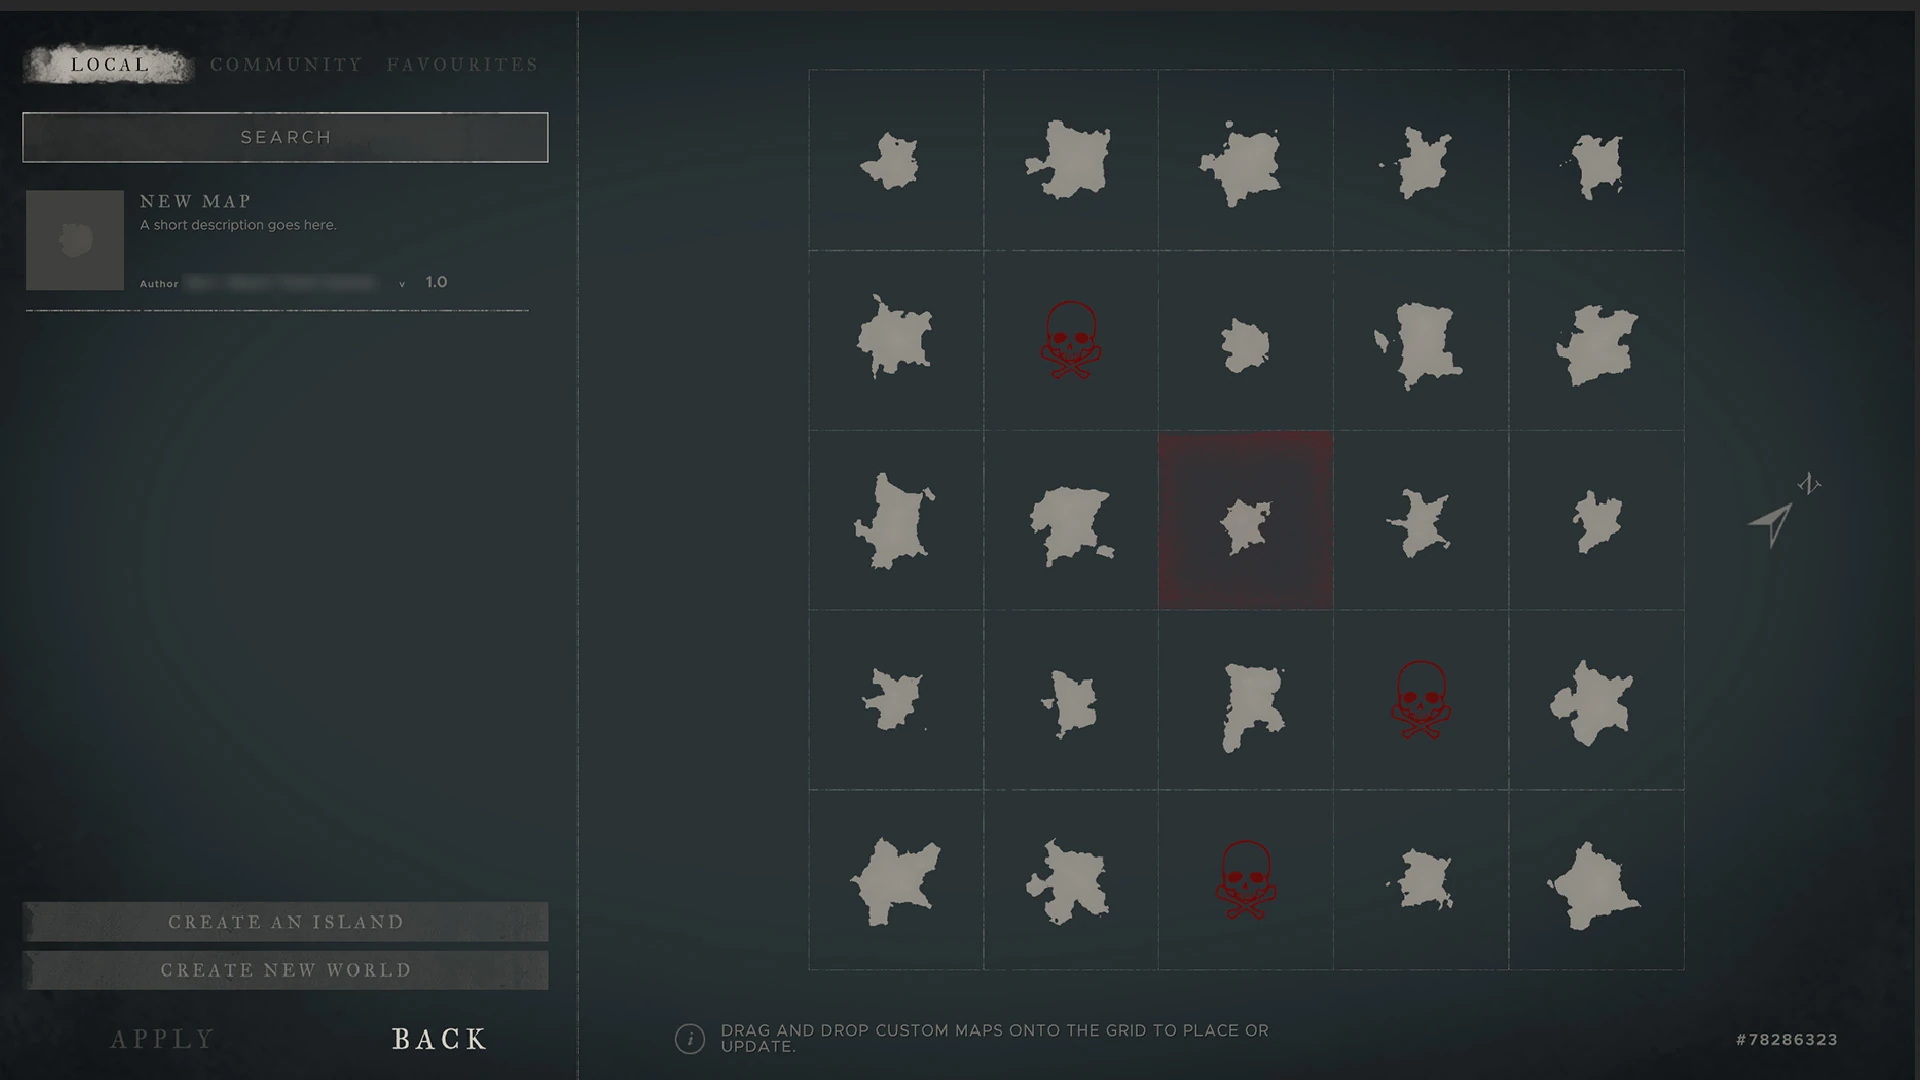
World Map
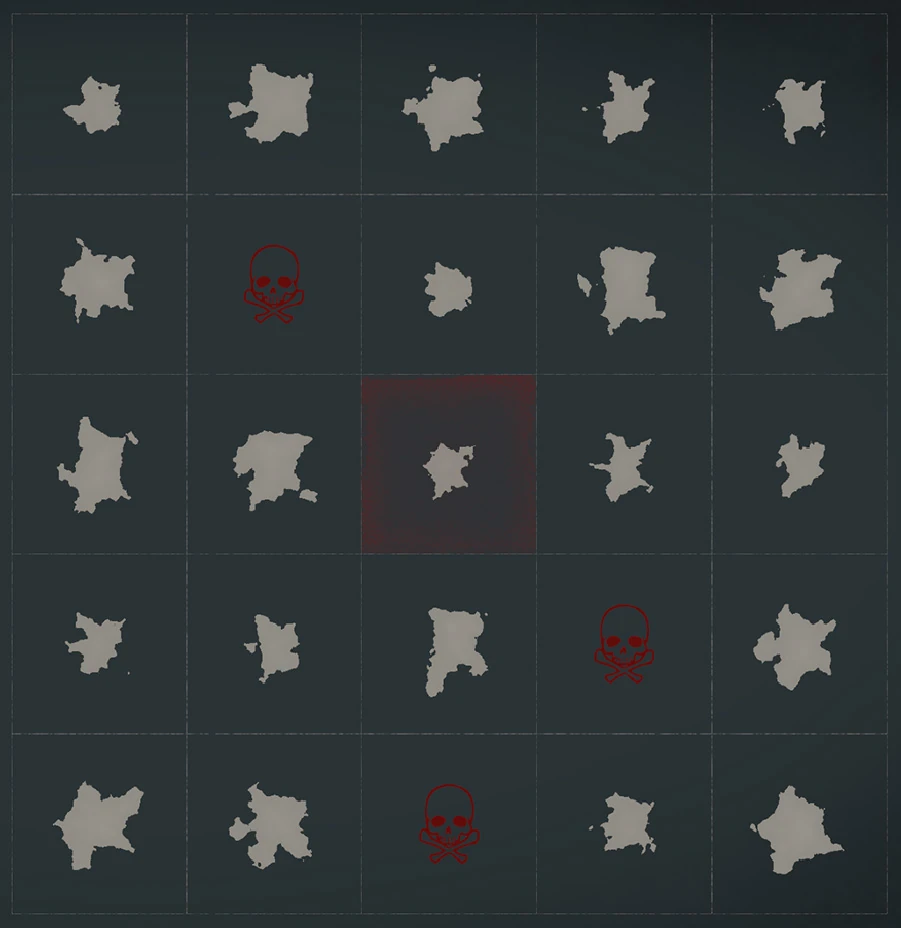
On the right side of the Cartographer is a grid map displaying the current World.
Player current position is displayed by the highlighted red tile.
Story mission tiles are displayed by the ""Red Skull"" icon.
To add custom maps see "Custom Maps".
Custom Maps
On the left side of the Cartographer is a panel storing custom maps located within your Stranded Deep Data folder.
Custom Maps can be found and placed in Stranded Deep Installation file directory found at: Stranded Deep/Editor/Maps.
Custom Maps can be selected, dragged, and dropped, onto any existing tile permitting it is not a Story tile (marked by the Red Skull), or your last saved position (marked by the Red Outline).
To Create a custom map see "Map Editor".
Map Editor

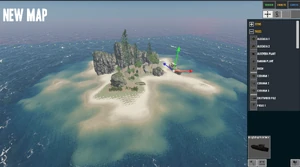
The Map Editor is found by navigating through Stranded Deep's Main Menu > Cartographer > Create An Island found at the bottom left side of the screen.
This will open up a new scene with a single, randomly generated Island terrain.
The right side of the screen features an Editor Panel where the user can edit the terrain, objects, and settings of the map.
The three panels are the Terrain Editor, Object Editor, and Camera.
Terrain Editor
This is where the user can directly Edit the Island's terrain settings.
Terrain Settings
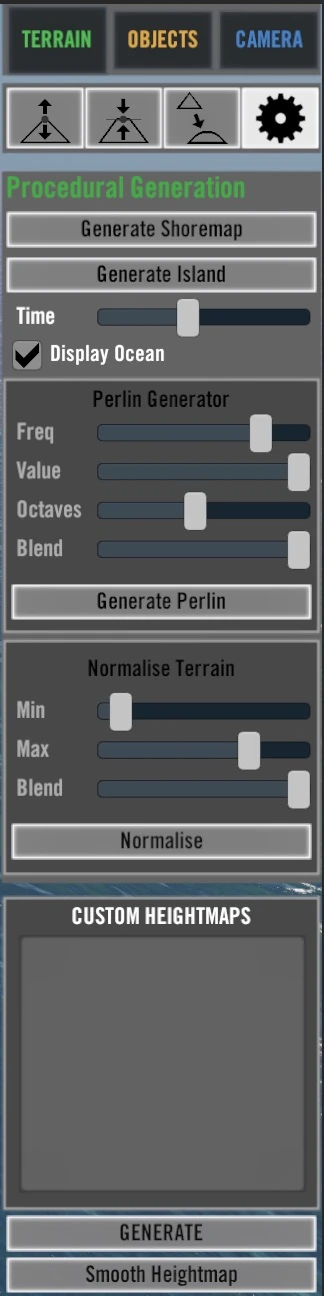

This is where the user can directly Edit the Island's terrain to smooth out any sharp edges.
Generate Shoremap will regenerate the ocean shoremap (where big waves and small waves should be).
It's a good idea to Generate this periodically after making changes to the terrain's height.
Generate Island will generate a completely new Island terrain. This will warn the user before doing so as this feature will remove all other objects.
Time Slider effects the time of day.
Display Ocean toggles the visibility of the ocean on/off.
Generate Perlin will generate random noise based on the Perlin Generator Values.
Normalise will squish the terrain height between a minimum value and a maximum value.
GENERATE will generate a heightmap based on the selected custom heightmap image.
Smooth Heightmap will smooth sharp edges on the terrain.
Terrain Height
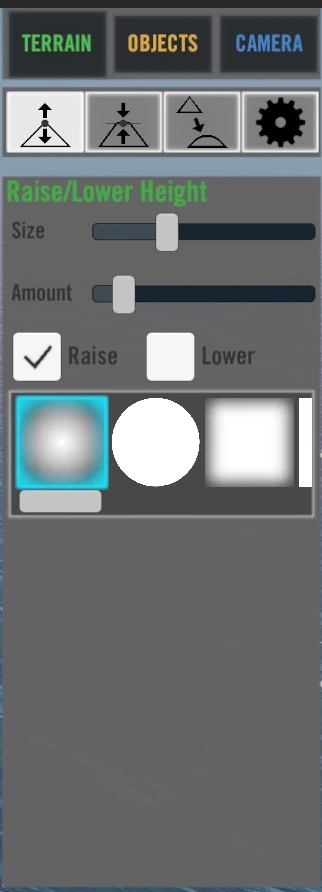
This is where the user can directly Edit the Island's terrain height.
The Size slider will adjust the effected area overlay size.
The Amount slider will adjust intensity of the effected area when changed.
Selected either Raise or Lower will either increase or decrease the terrain height.
Once a desired setting is selected, moving the cursor over the terrain shows the area to be edited by a blue overlay.
The overlay mask can be changed by selected a desired icon.
By clicking and holding Left Mouse Button the desired area will be lowered or raised.
Terrain Sample Height
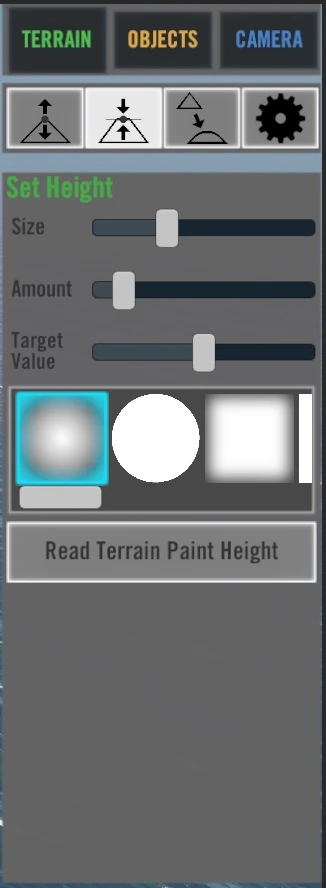
This is where the user can directly Edit the Island's terrain height by sampling a specific existing height on the terrain.
This tool can be useful for leveling out specific areas.
The Size slider will adjust the effected area overlay size.
The Amount slider will adjust intensity of the effected area when changed.
The Target Value slider will select the desired height the terrain will be set to. Alternatively, by holding Shift and clicking Left Mouse Button the Target Value will be set to the selected terrains height at that specific point.
Once a desired setting is selected, moving the cursor over the terrain shows the area to be edited by a blue overlay.
The overlay mask can be changed by selected a desired icon.
Terrain Smooth

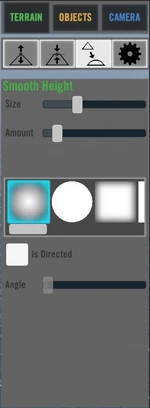
This is where the user can directly Edit the Island's terrain to smooth out any sharp edges.
The Size slider will adjust the effected area overlay size.
The Amount slider will adjust intensity of the effected area when changed.
Once a desired setting is selected, moving the cursor over the terrain shows the area to be edited by a blue overlay.
The overlay mask can be changed by selected a desired icon.
Object Editor

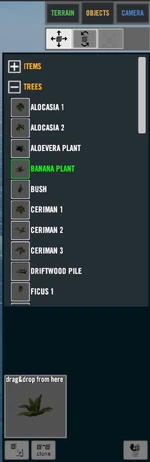
This is where the user can directly Add, Remove, Position, and Rotate Objects.
Objects are categorised alphabetically and in specific category folders. Clicking on the + symbol expands the folder, and the {{Key|-} collapses it.
Once an object is selected it can be clicked and dragged onto the Island from the "Drag&Drop" button at the bottom of the Editor panel.
Objects placed within the scene can be selected and moved around by the transform handles.
Moving and Rotating Objects
To Move a selected object press T or select the move icon at the top of the editor panel.
To rotate a selected object press R or select the rotate icon at the top of the editor panel.
Clone Objects
To Clone a selected object select the "clone" icon at the bottom of the editor panel.
Focus Object
To focus on a selected an object press F or select the Focus icon at the bottom left of the editor panel.
Delete Object
To delete on a selected an object press Delete or select the Trashcan icon at the bottom left of the editor panel.
Camera
The Camera setting is a planned feature to add custom map preview images. This feature is currently disabled though and does nothing.
Saving a Map
To Save a Map currently being worked on, press Escape and select Save.
You can also name your map and give it a description here.
Note: There is no Undo feature, or Auto Save, so saving and backing up custom maps is necessary.
Loading an Existing Map
To Edit an existing Map, select it in the Catrographer on the Left hand side and click Edit.